
Learning your first chords
Beginner Guitar Essentials Lesson 3
This series of lessons will set you up for success on the guitar. You’ll learn what to focus on as a beginner, what to ignore, and how to structure your practice so you can start using what you’re learning to play songs as quickly as possible!
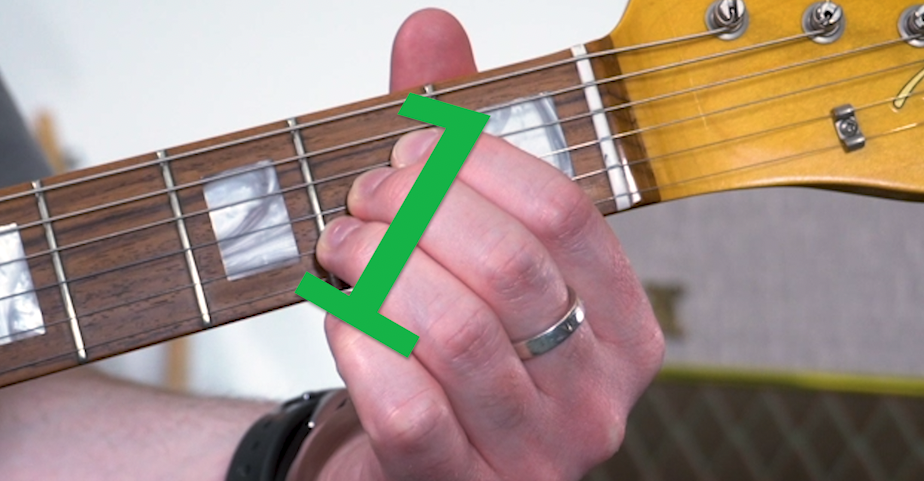
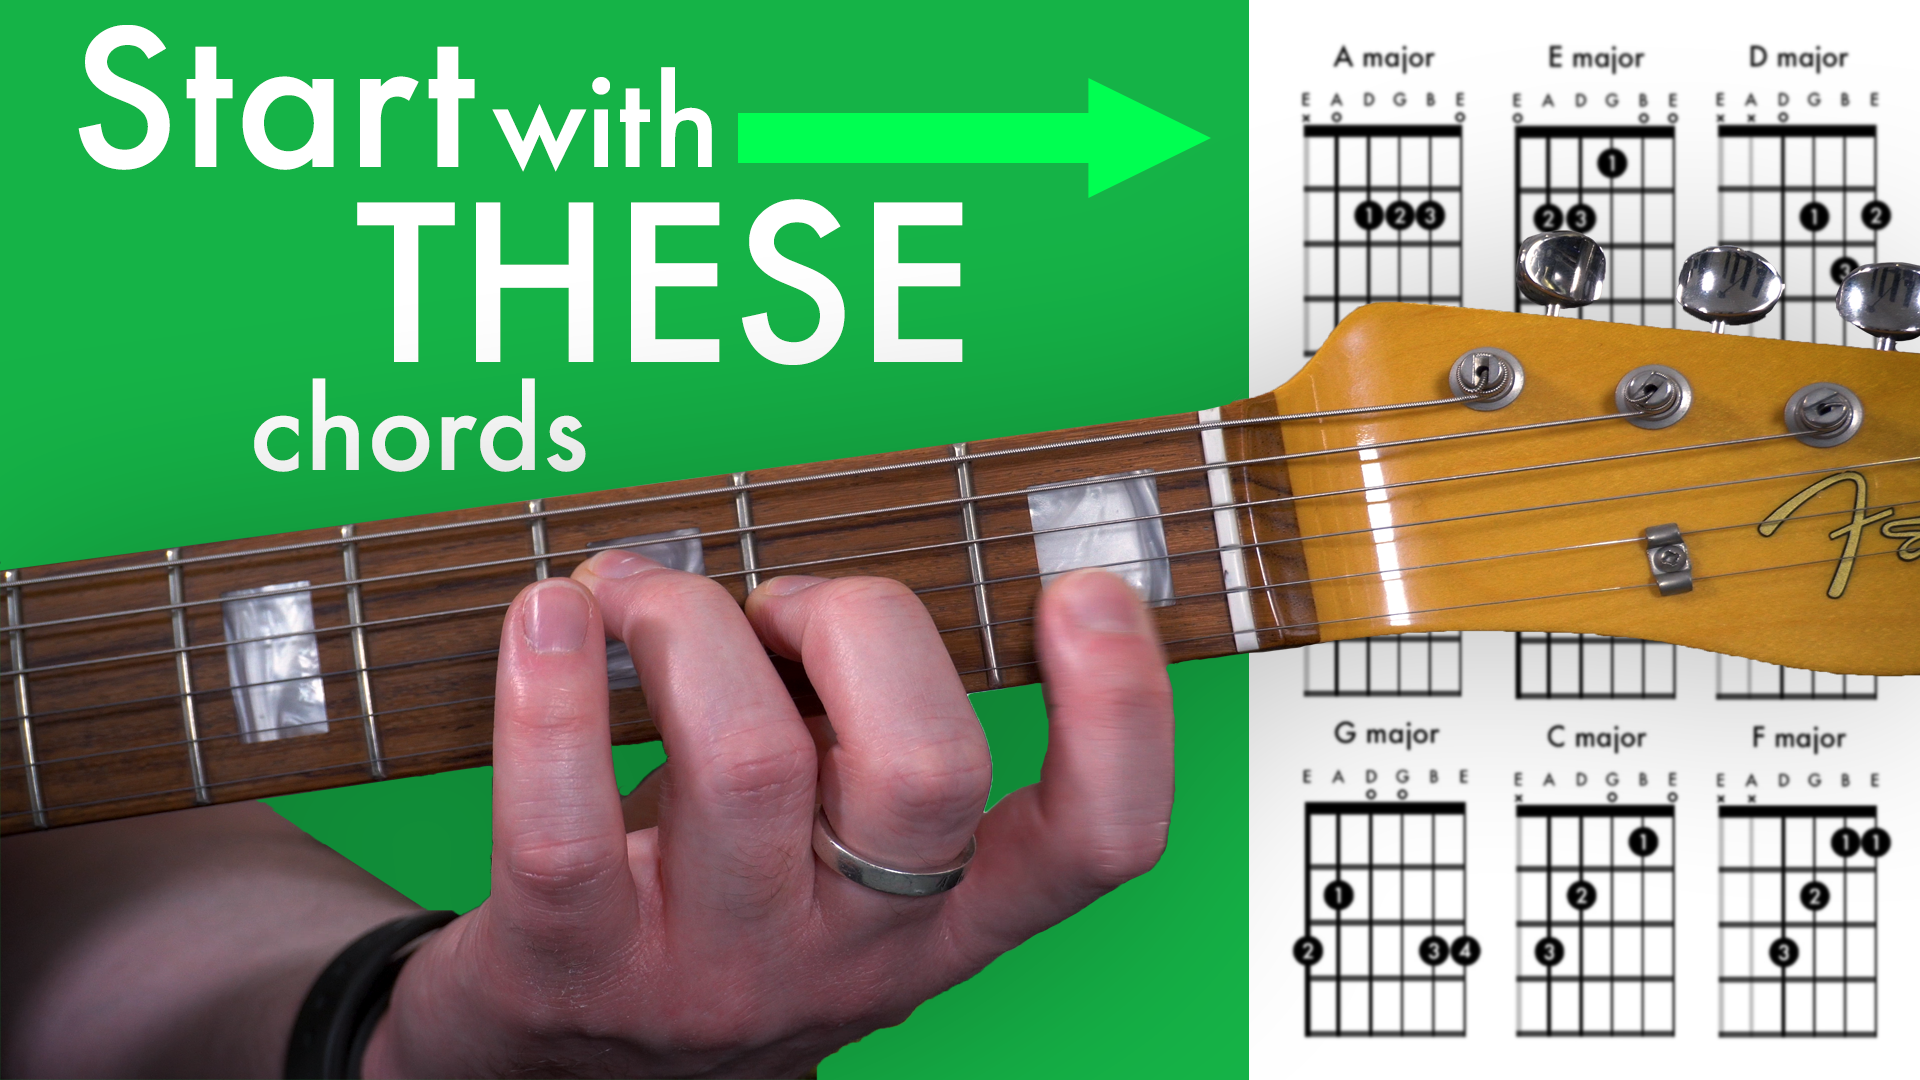
How to play A major:
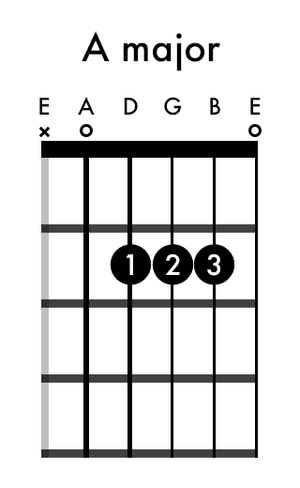
Put your first finger in the second fret on the D string
Put your second finger in the second fret on the G string
Put your third finger in the second fret on the B string
I like to think that the shape of the A major open chord looks like the number one and A is the first letter of the alphabet.
A great way to remember which strings to strum is to understand that because A major is an A-type chord, we strum from the open A string.
The reason we do this is because the lowest note we hear creates the context in which we hear all the other higher-pitched notes. We want to hear them as an A chord, so we need to hear A as the lowest note. In order to have A as our lowest note, we need to have an open A string. If we understand this, it will be easy to remember that we have to form the shape with our first finger starting on the D string (because we need the A string to remain open).
We want to keep the three components of a good-sounding chord in mind. However, for this particular chord, we can’t actually maintain a good fretting position with every finger.
Sometimes you’ll find you have to compensate and that’s okay, we just have to be aware of the three components of a good-sounding chord and how we are compensating for one of them by pressing harder.
Don’t worry about trying to maintain an excellent fretting position for your A major chord. Sometimes, it’s physically impossible to achieve a perfect fretting position. In these cases, understanding the other two components of a good-sounding chord will help us compensate appropriately.
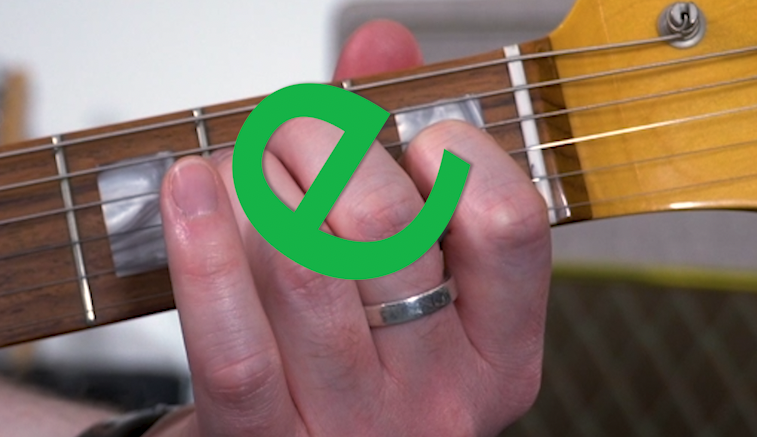
How to play E major:
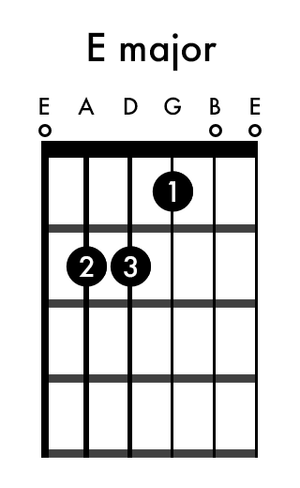
Put your first finger in the first fret on the G string
Put your second finger in the second fret on the A string
Put your third finger in the second fret on the D string
E major is an E-type chord so remember to strum from the E string (all of them in this case).
If you use your imagination, you might be able to see how the shape we form with our fingers to play an open E major chord kind of looks like a lower case ‘e’. It’s possible this analogy is stretching things a little bit, but the point of these memory hooks is to help you notice other little details that will help you remember the shape. Even if you can’t really visualise this lower case ‘e’ scenario, you could still use it as a memory hook. Just think to yourself, “this is the shape some crazy guitarist on the internet said looks like a lower case ‘e’... How on earth did he see that??” Either way, it’s going to help you remember where to put your fingers in order to play an open E major chord.
Remembering our bass note rule from before and how the lowest note we hear gives context to the higher notes; this is an E-type chord, so we’ll need to strum from the low E string.
E major is another example of a chord where we can’t have an excellent fretting position with every finger. In this case, you might notice your second finger sits a little further back in the fret than your third finger. Understanding where we are limited in our ability to demonstrate good fretting position will help us realise where we need to compensate with the other two components of a good-sounding chord.
How to play D major:
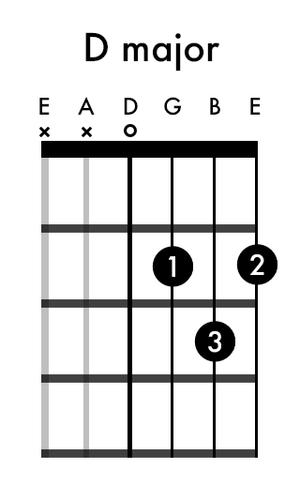
Put your first finger in the second fret on the G string
Put your second finger in the second fret on the high E string
Put your third finger in the third fret on the B string
D major is a D-type chord so remember to strum from the D string.
One useful way of thinking about the D major chord is to remember that you put two fingers in the second fret and the third finger in the third fret.
I also like to visualise joining the dots of the D shape and noticing they form a capital ‘D’.
Our D major chord is an example of a chord where we can have an excellent fretting position for every finger. If you’re having trouble with this, try rotating your hand slightly clockwise while you’re holding the shape. It’s okay if the side of your knuckle at the base of your index finger touches the fretboard.

We only want to strum four strings when we are playing the D chord, but don’t worry about trying to be too accurate. It’s more important to develop a good strumming arm than obsess about only trying to play only the strings of the chord. It’s better that you get the technique for strumming correct so you can refine it later than develop a wrong technique that you’ll have to fix.
You don’t want to compromise the progress of your strumming technique just to have a slightly better-sounding D chord right now.
Enjoying the lessons?
This series of lessons is test footage from the first part of our upcoming beginner guitar course. These lessons are all from the first of 10 sections that will help you form a rock-solid foundation when you’re starting out as a beginner guitar player.
If you’ve got any feedback on the material, please leave a comment. I’d love to hear what you think!
And, if you want to be one of the first to hear when the new course drops, make sure you’re signed up for the Guitar Nutrition newsletter.
In the next part of this lesson series, we’ll go over how to hold a pick when you are playing the guitar.
A guitarist who has learned all the notes on the fretboard: Can more effectively learn scales and chords; Has a better understanding of keys, intervals, and scale degrees; Is able to more easily memorise songs; Has a greater capacity to understand music theory; Is more effectively able to develop their aural skills; Gets ‘lost’ far less frequently when they are improvising on the guitar.