
How to play better-sounding chords
Beginner Guitar Essentials Lesson 2
This series of lessons will set you up for success on the guitar. You’ll learn what to focus on as a beginner, what to ignore, and how to structure your practice so you can start using what you’re learning to play songs as quickly as possible!
The three components of a good-sounding chord
There are three things we need to get right to play a good-sounding chord. If we do each of these things correctly, our chord will sound fantastic. If it doesn’t, we’re doing one of the three things wrong.
To get great-sounding chords, make sure you:
Push hard
Use the tips of your fingers
Demonstrate good fretting position
Push hard
Playing a good-sounding note on the guitar is a lot more difficult than on an instrument like the piano. There is tension on the strings of the guitar, which means they require strength in our fingers to press down.
It’s like lifting weights. It might be difficult at first, but as you become stronger, you’ll find it gets easier and easier until you are able to get a great-sounding chord every time.
Use the tips of your fingers
Sometimes, you’ll strum a chord and think it sounds good. However, if you play the notes one string at a time you might notice one or two of them are actually muted. You push harder, but it doesn’t do anything. In this situation, the problem is often a finger hanging down and muting the string below. Each finger should only be touching the string it is actively playing.
Plucking the strings one at a time is a great way to check the clarity of your chords as you develop an ear for what they are supposed to sound like.
Demonstrate good fretting position
Whether you like it or not, you will develop a default position where you put your finger in the fret. If it’s going to happen anyway, you may as well make sure that the default position is the ideal position.
When you’re fretting a note, make sure that your finger is three-quarters of the way up the fret. The further back you go the harder you have to push to form a clear sound. This is because the note is produced by the string being held tight against the metal bar. The further back you go, the more pressure you have to apply to pull the string tight against the fret.
Enjoying the lessons?
This series of lessons is test footage from the first part of our upcoming beginner guitar course. These lessons are all from the first of 10 sections that will help you form a rock-solid foundation when you’re starting out as a beginner guitar player.
If you’ve got any feedback on the material, please leave a comment. I’d love to hear what you think!
And, if you want to be one of the first to hear when the new course drops, make sure you’re signed up for the Guitar Nutrition newsletter.
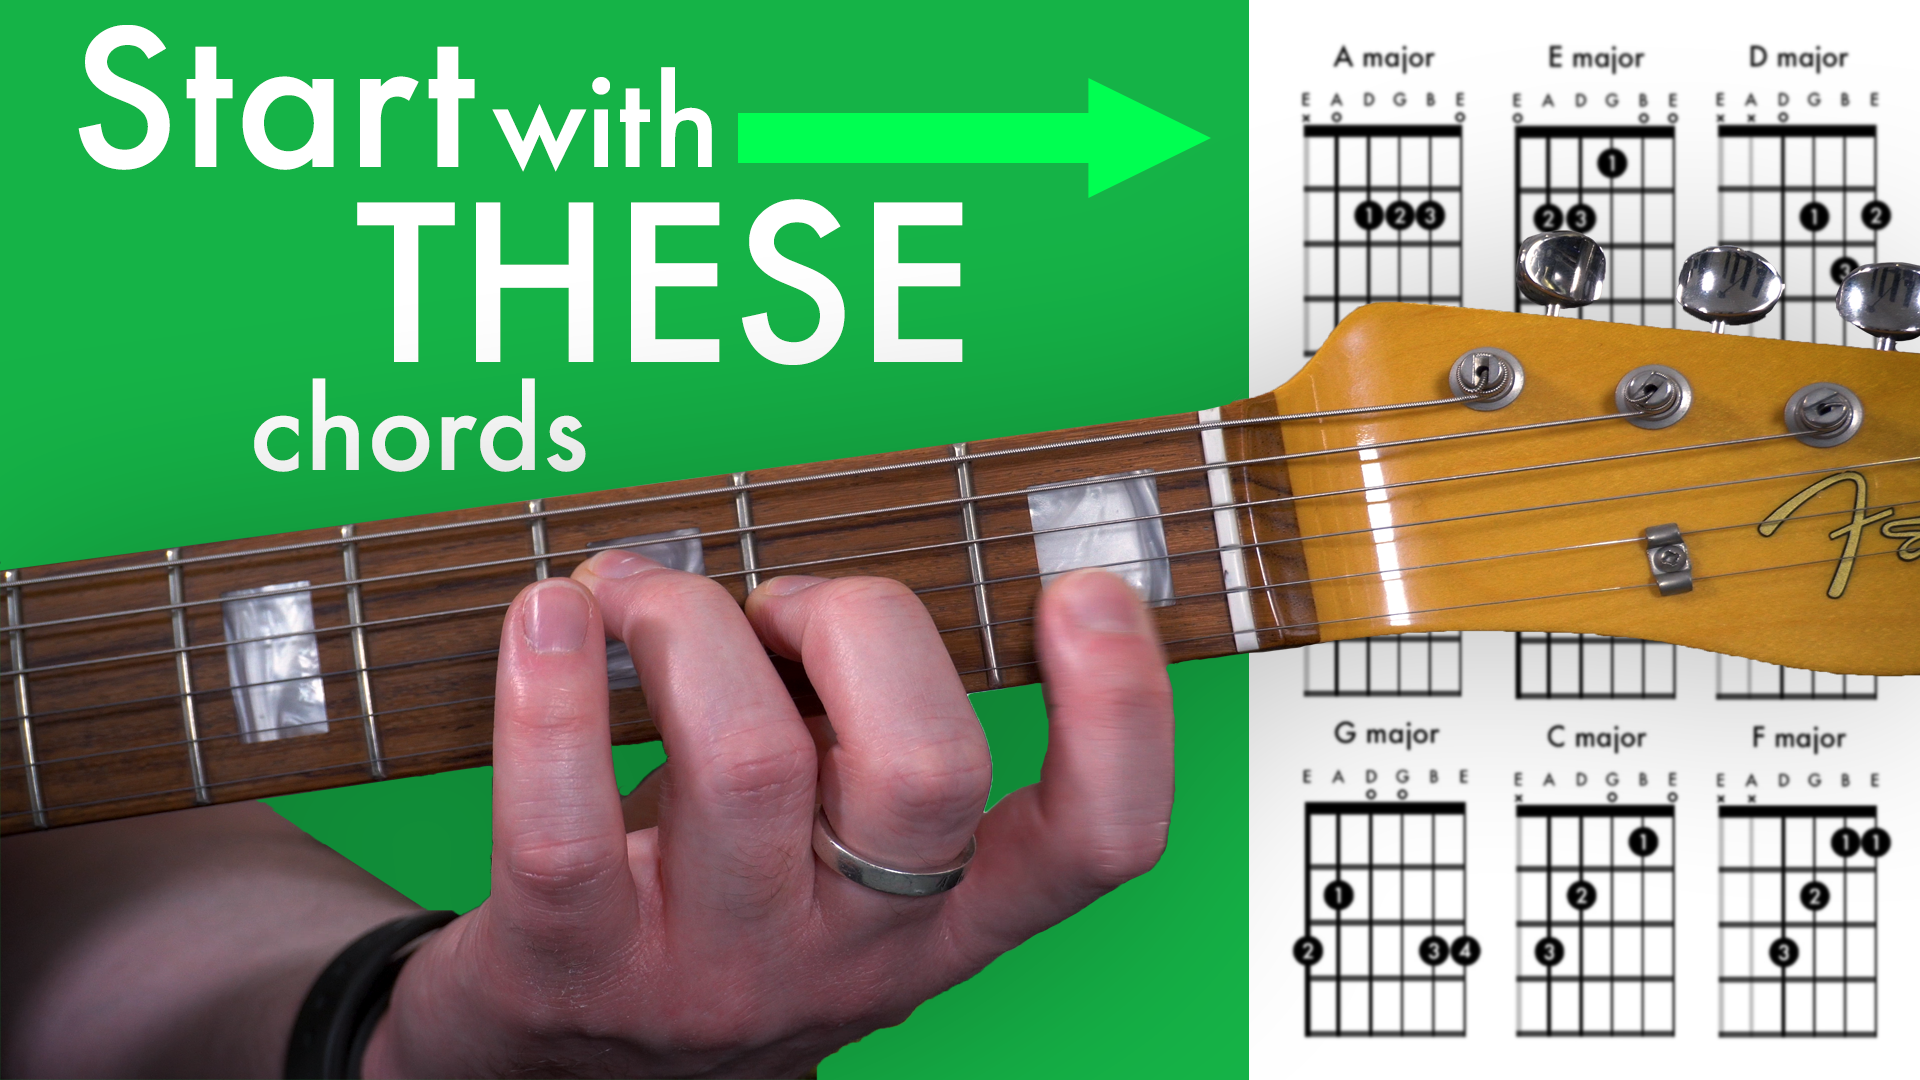
In the next part of this lesson series, we’ll go over the first three chords you need to learn as a beginner.

A guitarist who has learned all the notes on the fretboard: Can more effectively learn scales and chords; Has a better understanding of keys, intervals, and scale degrees; Is able to more easily memorise songs; Has a greater capacity to understand music theory; Is more effectively able to develop their aural skills; Gets ‘lost’ far less frequently when they are improvising on the guitar.